If you own a Gen 6 2017 Maserati Quattroporte, like mine, you might have run into a common issue: the rear AC vent’s chrome adjuster popping off. This happened to mine, and I’m sharing my repair journey to help you fix yours while keeping things straightforward and practical.
The Problem and Initial Misstep
The rear vent’s chrome adjuster had come loose, a frequent issue with these cars. Thinking I could outsmart the problem, I bought a replacement adjuster on eBay. Big mistake. First, it wasn’t chrome but a dull, patina-like paint finish. Second, during installation, I lost the small piece linking the vents together. Worse, I discovered the other adjuster had two broken snaps, meaning it was only a matter of time before it failed completely. Lesson learned: piecing together individual parts is a hassle.
Choosing the Right Fix
After some research, I realized a full vent unit replacement was the smarter move. There were two options:
- Budget Route ($25): Buy just the front vent piece. This requires transferring the adjustment wheels and rear blend doors from the old unit, which is fiddly and risks breaking delicate parts.
- Complete Unit ($60–$150): Purchase a used, complete vent unit. Many used units I found online had the same chrome piece missing, and I wasn’t thrilled with their condition.
I decided to try transferring parts to a new front piece but kept a used complete unit as a backup plan if things went south.
The Replacement Process
The new vent front wasn’t identical to the original. The old one had a soft-touch matte finish, giving it a premium look, while the replacement was less luxurious but still functional. Here’s how I tackled the repair:
Tools Needed
- Spudger or plastic pry tool
- Flathead screwdriver
- Phillips screwdriver
- T20 torx bit driver
Step-by-Step Guide
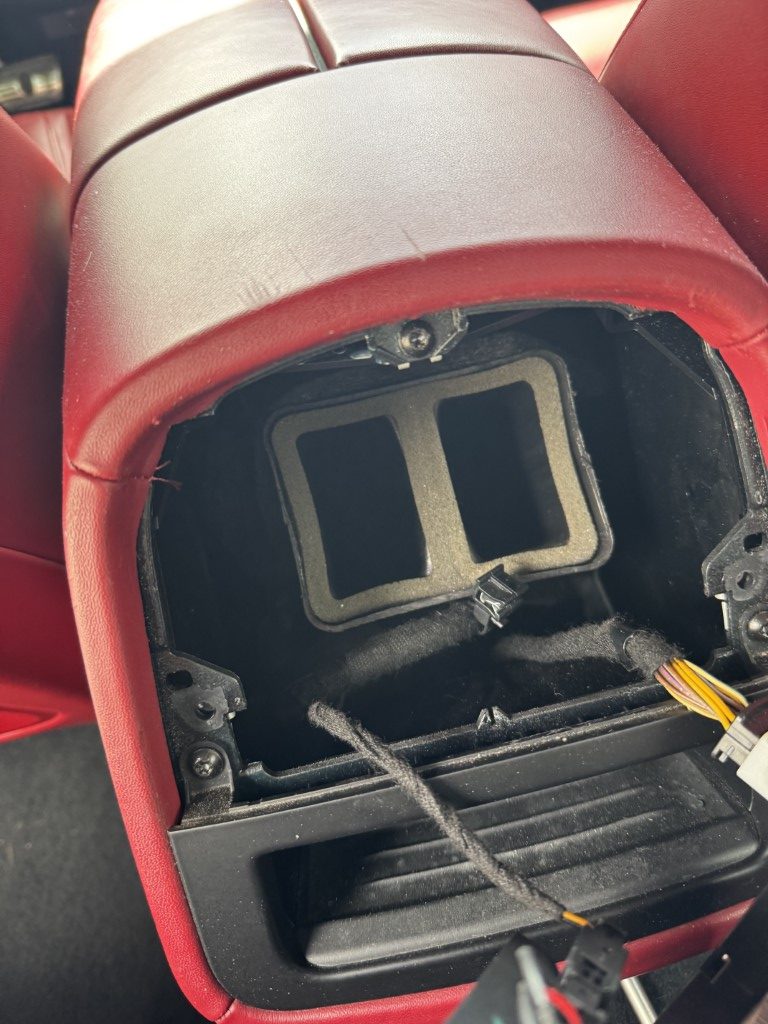
Remove the Center Console Panel
Using a spudger, carefully pry out the center console to access the vent’s two screws.

Extract the Vent Unit
Remove the two T20 screws and give the vent unit a firm tug outward to release it. Be cautious not to drop the screws into the console—trust me, it’s a pain to retrieve them. Watch out for the connected wires. Unclip the wire harness to fully separate the unit from the console.
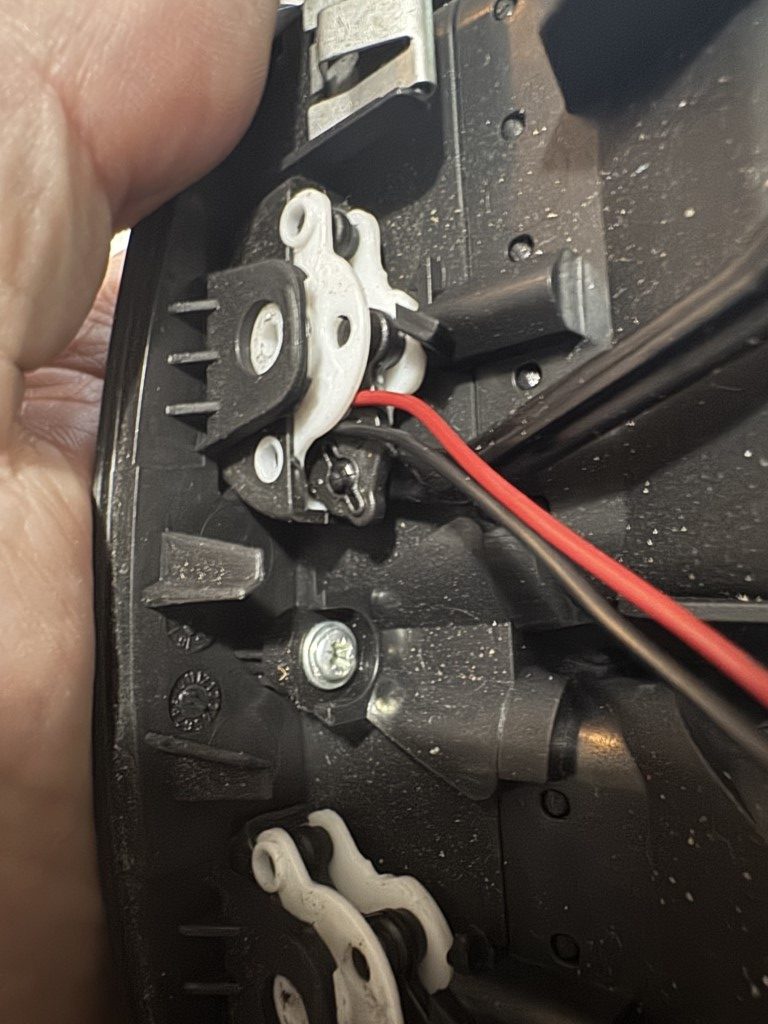
Disassemble the Wheels
This is delicate work. Pop the bar connecting the wheel to the blend door on each side. Be gentle—breaking these clips ruins the repair. Each side has a detent with a spring (like those in an AR platform rifle). Thankfully, mine didn’t launch across the room. Tilt the wheel to free it from the bottom hole, then use a flathead screwdriver to carefully pry the top pin out of its clip.
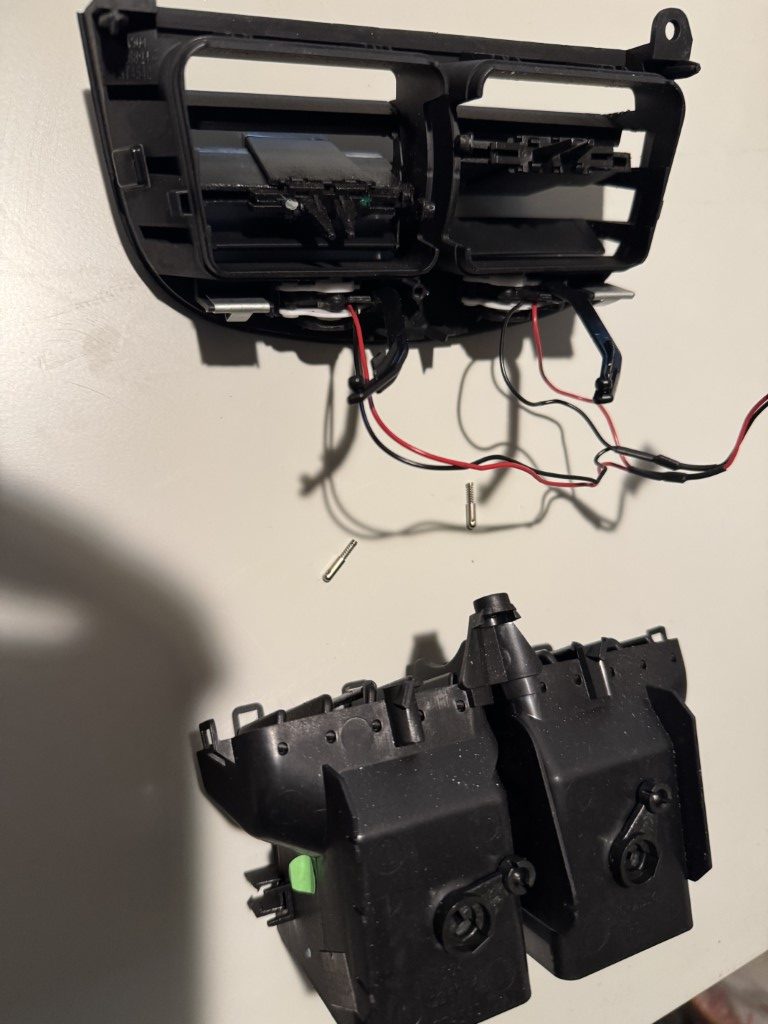
Separate the Vent Unit
The vent unit splits into front and back halves with one screw and six plastic tabs. Remove the screw first, then gently pop each tab, working from one side to the other. You’ll end up with the back half (with wheels and wires) and the new front half.
Reassemble with the New Front
Reverse the disassembly process. Carefully replace the detents, align the adjusters with the vent rods, and snap the halves together. Secure with the screw. This step takes patience to ensure the adjusters properly capture the vents.
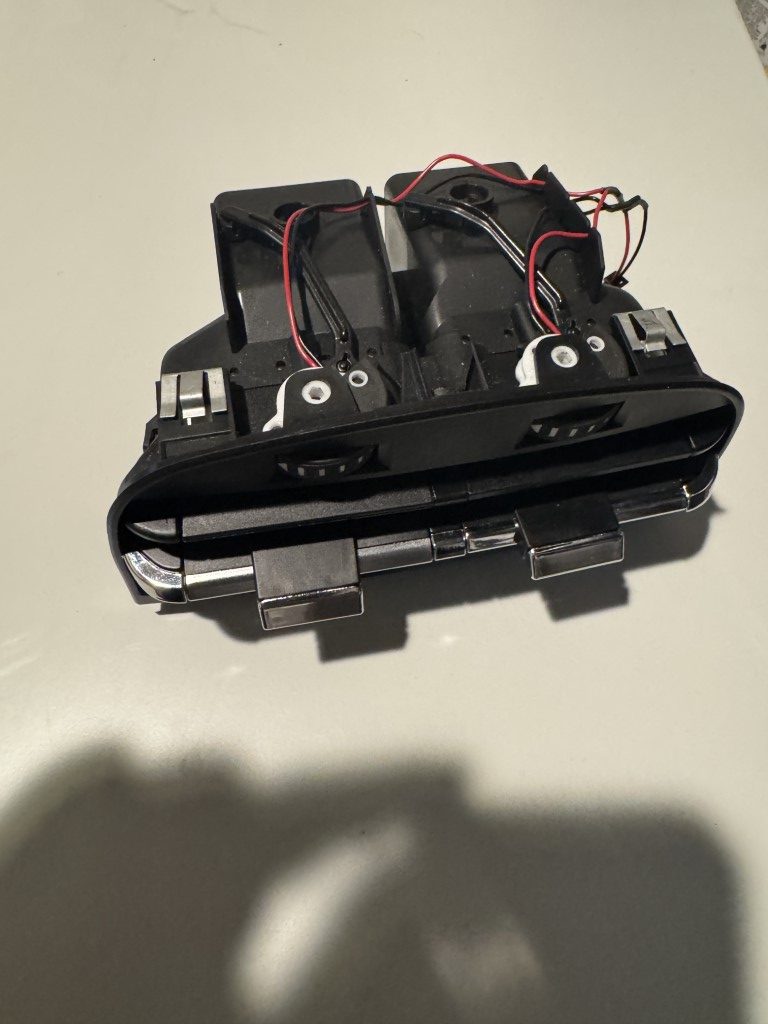
Reinstall the Wheels
Insert the wheels with the printed side first. Spread the clip just enough to slide them in, then move the wheel back and forth until the detent clicks satisfyingly at the motion’s start and end. Reattach the rod to the blend door and repeat for the other side.
Manage the Wires
The wires have kinks that align with cuts in the support fins for proper management. One of my wires was too tight, so I adjusted it for more slack to avoid strain.
Transfer Metal Clips
Pop the two metal clips from the back of the old vent front and attach them to the new one.
Reinstall the Vent Unit
Reconnect the wire harness, slide the vent unit into place until it snaps, and secure it with the two screws. Snap the center console panel back into place.

The Result
The new vent looks significantly better and functions smoothly. While the finish isn’t as premium as the original, it’s a small price to pay for a fully working unit.
Alternative: Buy a Used Unit
If the idea of disassembling tiny parts makes you nervous, opt for a used complete vent unit. They’re pricier ($60–$150), but it’s a simpler swap—just clean it up, as used units often arrive dusty. It’s a trade-off between cost and ease.
Final Thoughts
This repair was fiddly but doable with patience and care. Whether you go the budget route or splurge on a complete unit, you’ll restore your Quattroporte’s rear AC vent to full functionality. Hopefully, this guide saves you some trial and error. Let me know in the comments if you’ve tackled this repair or have tips to share!